
KOL Database
Store, filter, and organise the creators you track.
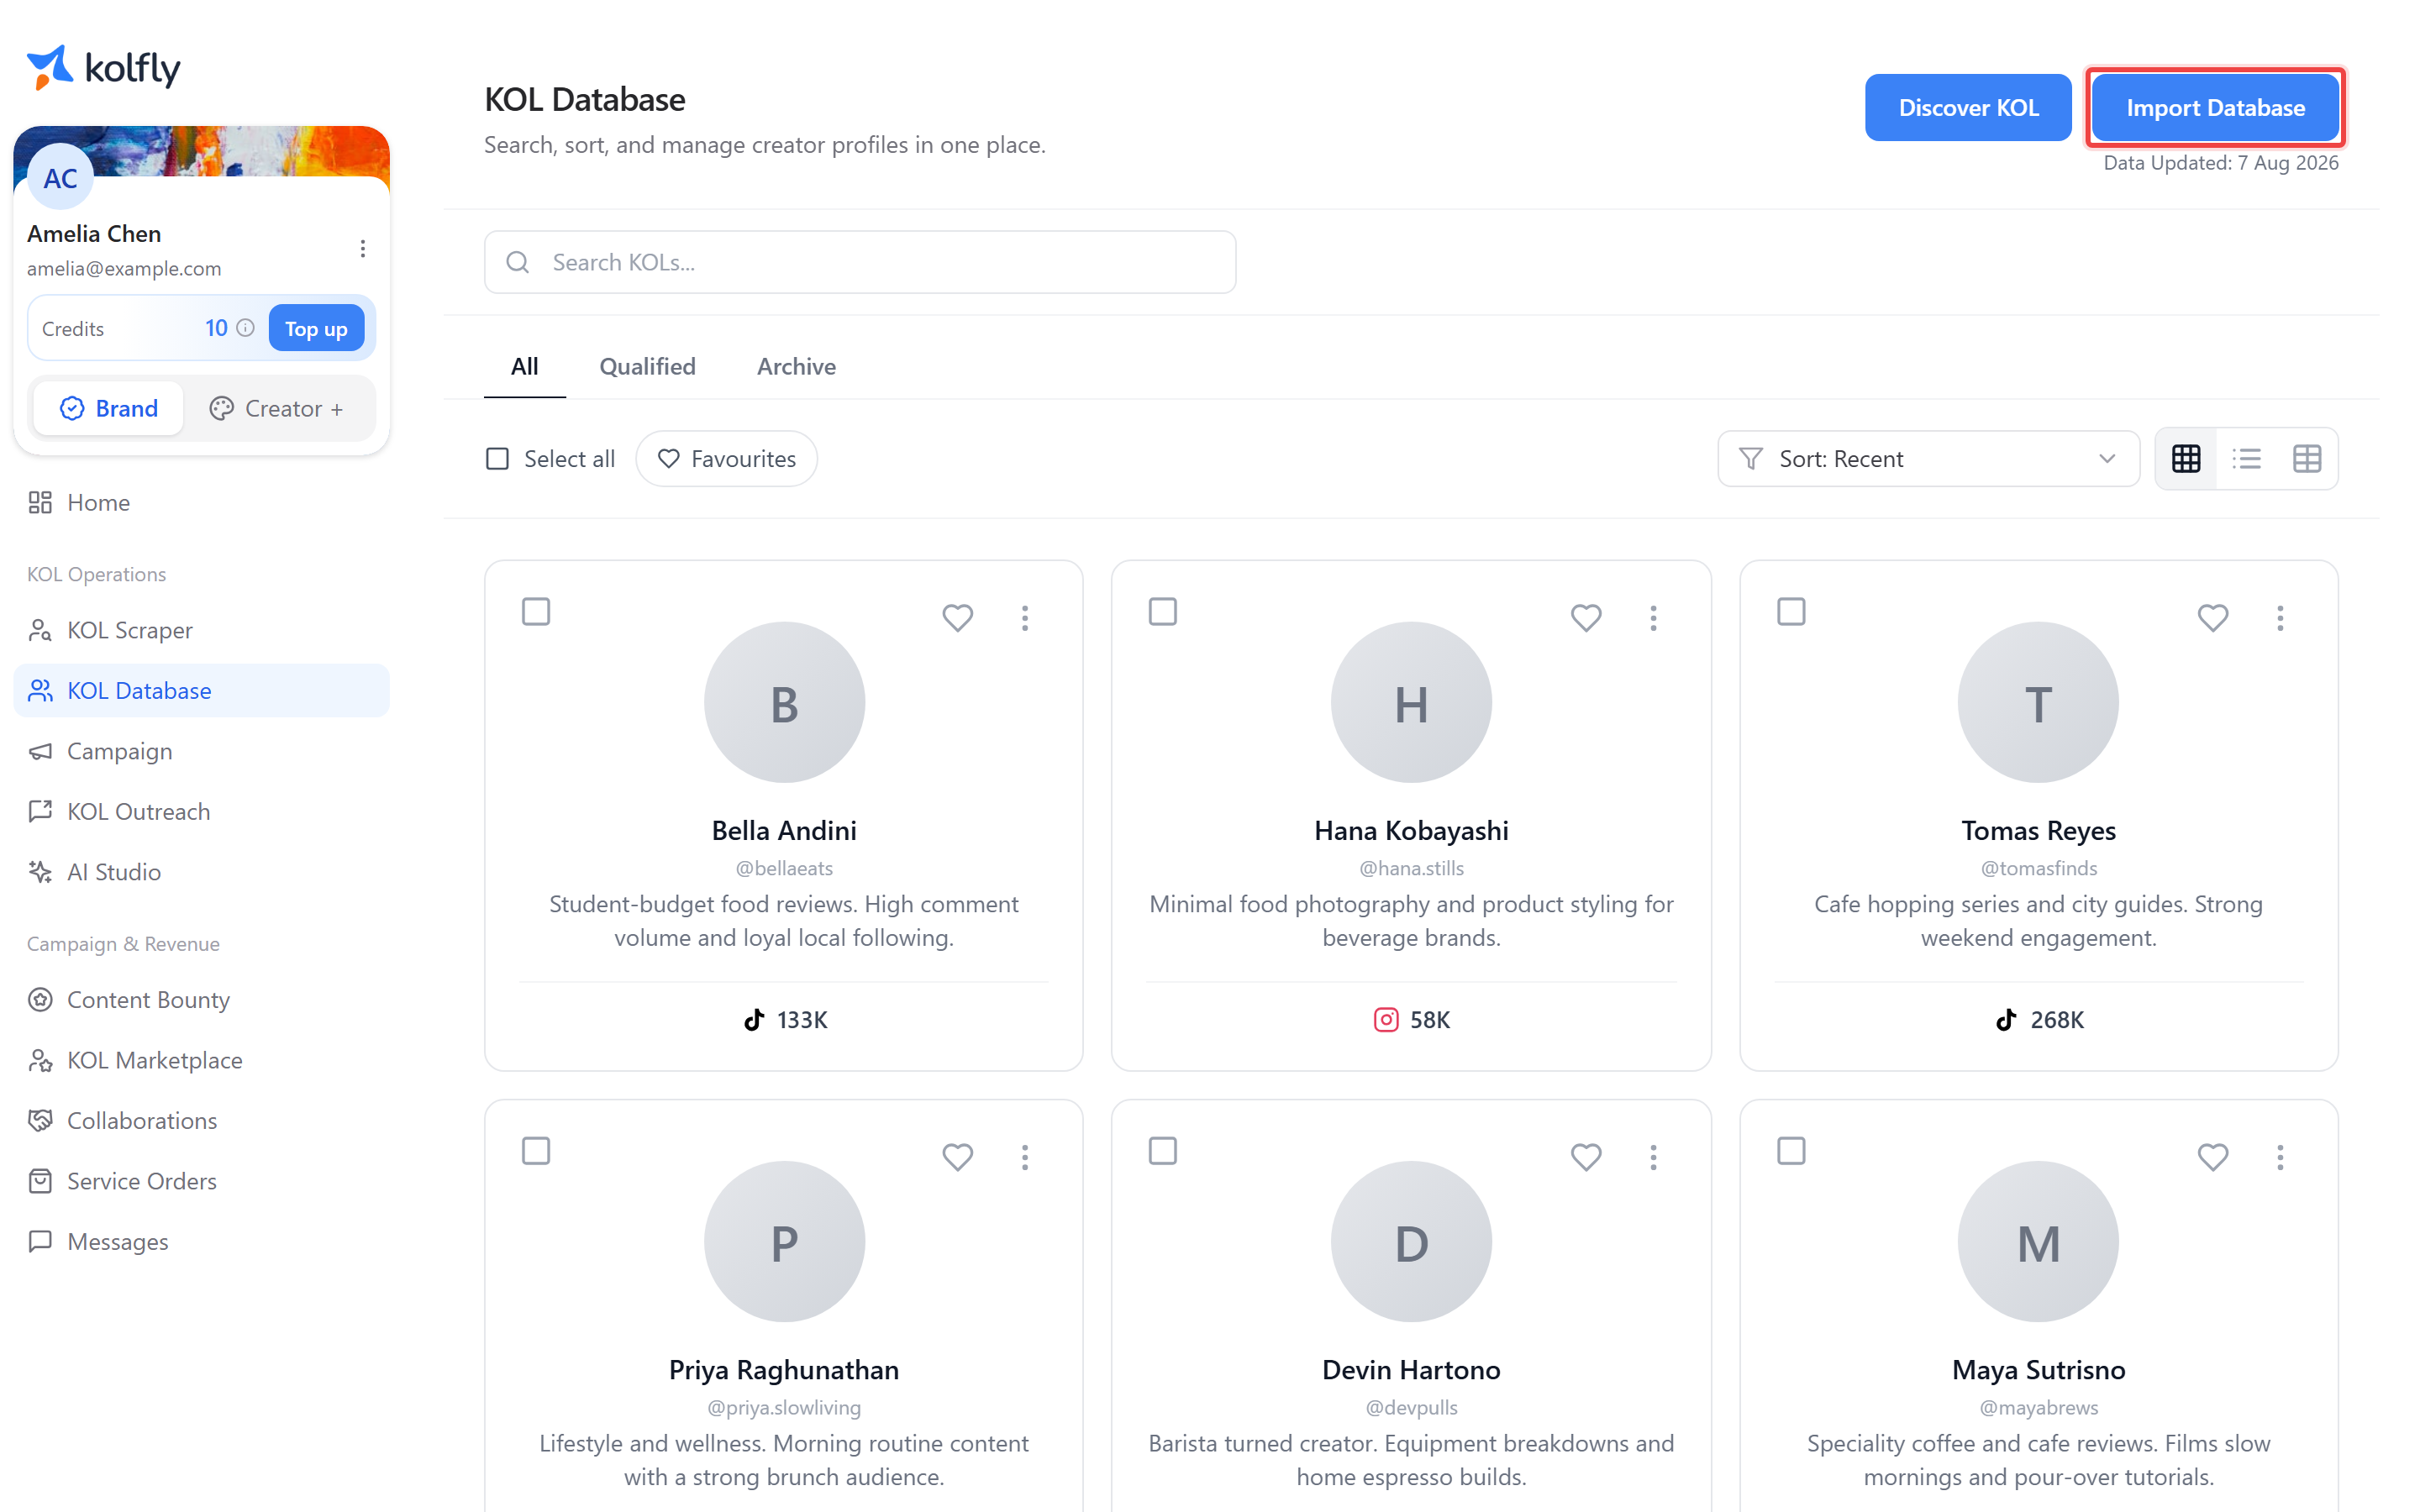
KOL Database stores every creator you have imported or added by hand, and is where you search, organize, and manage them before outreach or campaigns.
Finding it
Open KOL Database from the sidebar.
How it works
The KOL Database list page has a search bar (placeholder "Search KOLs...") and three tabs: All, Qualified, and Archive. All holds every creator in your database, Qualified holds the ones you have marked as qualified, and Archive holds the ones you have archived.
You can switch between Grid, List, and Table view modes, and sort with Sort: Recent, Sort: Followers (High to Low), or Sort: ER (High to Low). A Favourites filter chip narrows the list to creators you have favourited, and a Select all toggle selects every visible row so you can act on them together.
Cards can carry two badges: NEW, for creators added in the last 14 days that you have not yet acknowledged, and Qualified, for creators moved into the Qualified tab.
Admin and owner users see two extra buttons, Discover KOL and Import Database, and get a row-level Delete action alongside the favourite (heart icon) and View Details actions available to everyone.
Searching and filtering KOLs
- Type into Search KOLs... to filter by name or handle.
- Select the All, Qualified, or Archive tab.
- Click the Favourites chip to show only favourited creators.
- Switch view mode and sort order as needed.
Importing KOLs from a spreadsheet
- Click Import Database (admin or owner only).
- Optionally download the Basic Template .xlsx file to match the expected columns.
- Upload a file in .csv, .xls, or .xlsx format. Other formats are rejected.
- Watch the row-by-row import progress as the modal processes the file.
- Confirm the "N records imported successfully" message once the import finishes.
There is no client-side file size limit on the upload, so large spreadsheets are accepted.
Adding a KOL manually
- Go to the new KOL page.
- Enter Name.
- Select Gender: Male, Female, or Other.
- Optionally enter Email and Phone Number.
- Optionally add tags to Niches.
- Add one social account, required when creating a KOL: select Platform (Instagram, YouTube, TikTok, Twitter / X, or Facebook), then enter Handle and Followers.
- Click Save to create the record.
Name, Gender, and the social account fields (Platform, Handle, Followers) are required. Email, Phone Number, and Niches are optional.
Editing a KOL
- From the list, click View Details on a KOL card or row.
- Update Name, Gender, Email, Phone Number, or Niches.
- Review the linked social accounts; in edit mode they are read-only and link out to HypeAuditor and SocialBlade instead of being editable inline.
- Click Save to commit changes, or Delete to remove the KOL.
Managing KOLs in bulk
Bulk actions appear once you select at least one row, and the available actions depend on the tab you are viewing.
- Select one or more rows, or use Select all to select every visible row.
- On the All tab, click Qualify to move the selection to the Qualified tab, or Archive to move it to the Archive tab.
- On the Qualified tab, click Remove qualified to move the selection back out of Qualified.
- On the Archive tab, click Unarchive to restore the selection.
Limits
Import accepts .csv, .xls, and .xlsx files only; there is no client-side file size limit.
Troubleshooting
Discover KOL, Import Database, or row Delete not visible: these actions are limited to admin and owner roles.
Delete asks for confirmation: this is expected. Confirm the prompt to permanently remove the KOL.
Import fails to start: the file must be a .csv, .xls, or .xlsx file; other formats are rejected.